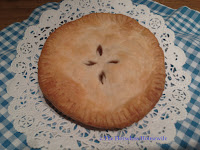
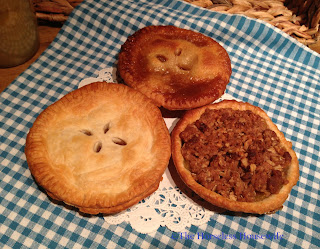
 First off, these pies take shape with Jonathan apples produced from the "miracle" tree on my Parent's property. Every person that has ever gazed at it's apple-laden branches in September, will also hear the tree's history from my Father. Planted sometime in the mid 70's alongside various other fruit trees, it was split and fallen by a massive lightening strike some ten years later. The following Spring, like the proverbial phoenix from the flame, it rose to be the modern day Matriarch of the backyard. Every family member, friend of the family, neighbor, neighbor of a family member, or friend of a neighbor that owns a horse, will be handed a bag breaking full of apples during the Fall season!
In preparation for this past Thanksgiving, I found this new pie pan from the Wilton baking line:
 Not that you may need a reason to spend money with a Big Box store coupon in your hot little hand, but I quickly imagined my Martha Stewart-esque spread of sampler apple pies with other desserts on the buffet table...
 First, if you can your own apples, a quart should be more than enough for the six mini pies. I used one pint and a half jar of homemade canned apple pie filling. I learned that the six mini pies are roughly equal to the filling of one regular 8" pie. If you do not have homemade canned filling, then proceed to a fresh apple pie recipe.
Since I already had rolled frozen pie crusts from the grocery, I fashioned two circles from one pie crust by cutting the dough from around a 5" bowl turned upside down. By re-rolling the scrap dough with a floured rolling pin, I was able to form the third crust. If you only wish to have single crust pies, you can stop with one pre-made crust. I used the second rolled crust from the package to form 3 top crusts using the same method as the bottom crust. Therefore, using one double roll package resulted in (3) two crust pies, and (3) one crust pies, which the later will be topped in crumble.
Once your crusts are ready, equally spoon in filling, and generously sprinkle with cinnamon sugar. You can also add a dash of nutmeg. Place the top crusts on, crimp with the business end of a fork or your fingers, and add the vents. Or, make a six pie sampler with my favorite crumble or carmel topping!
I like the simplicity of Dutch apple topping, which is roughly a mixture of 1/2 cup of brown sugar, 1/2 cup flour, 1/4 tsp. cinnamon and about 4 Tb. of cold butter blended thoroughly. Recently, I have added additional ingredients of walnuts, rolled oats, and of course, more cinnamon and nutmeg. If adding these additional ingredients, either add more butter or shortening, so that the topping doesn't dry out in the oven.
The carmel topping is simply 1/2 cup of brown sugar, and 4 Tb. warmed butter mixed with a 1/2 tsp. of vanilla extract until smooth. With a spoon or pastry brush, evenly spread over the pies with a top crust. Covers two pies.
Bake at 350 degrees for 20 minutes, or until cooked throughly. Even though I bake with a convection oven, I rotate the pan once for evenly browned crusts, and cover any "topping" pies with foil if they are browning before the un-topped pies.
Just one step closer to Martha; 'cause here they are!
Enjoy & Cheers!


