html xmlns:fb="http://ogp.me/ns/fb#"> The Horseless Housewife

Thursday, June 27, 2013

Quick Tips for Tick Prevention

     Although, I love what all this rain has done to invigorating my garden and including the hay fields on The Farm, it has also increased the tick population by default. The last time I checked on the bees at our property, I also had a few unwanted small Deer ticks clinging to my bee suit. Ewww. In the years that we have owned The Farm, we have never had a tick encounter. But now that the rain-fed grass has shot up underneath the Walnut stand, the tell-tale matted beds of the White Tail Deer have also increased, along with the ticks. Great.

     We already have begun the process of knocking down the grass, but I wanted to know what else I could do. Only deer ticks carry Lyme disease, and approximately 50% of female ticks are carriers, so how do I lower our odds? So I did some research, and found this great site from the University of Rhode Island named, Tick Encounter Resource Center: http://www.tickencounter.org/ which is dedicated to ticks and their prevention across the U.S.

Here are some quick referenced Tick facts:
www.tickencounter.org

-Ticks do not jump, or drop from trees, but rather lay in wait for a host on grass or shrubs up to a foot off the ground.
-Ticks always crawl up once they get on you. One preventive measure is to tuck your pants into your socks so that they can't get under your clothing.
-Although ticks can't swim, they can survive a trip in the wash machine or a hot shower. If you find a tick, flushing it down the toilet is the most successful route.

-Ticks can survive a frost and winter. 

-You have a 24 hour window to remove a feeding tick before any infections take hold.
-Most ticks are sensitive to humidity levels. Lucky for you, if a tick that finds it way into your car, it won't survive a hot, dry Summer's day.

Also, you can now buy treated clothing for tick prevention at many big box outdoor stores or online. These garments remain effective up to 70 washings. Or, if your a hiker or camper, you can ship your clothes/gear to be completely treated by T.E.R.C. recommended and E.P.A. registered company: Insect Shield (click here)
I, on the other hand, will be treating my boots and clothing with a soak/spray combination of Sawyer's, an E.P.A. approved permethrin insecticide designed for such; targeting the lower half of my body so not to accidentally expose the honey bees. 

Here's to a tick-free Summer... Cheers!


Thursday, June 13, 2013

No Bees? An End to the Beginning.


If I was a cigarette smoker, I guess this would have been the perfect time to puff and ponder over my little white hive. At least in my head, it would have been some romanticized image; like the Marlboro man on horseback-puffing trails of smoke as he watched over his herd from a grassy bluff...Except, I scarcely had a herd to watch over.  I wasn't going to submit to failure: I needed to get this operation to work, and I needed to do something about it now. I could buy a new Queen and have her here in about 2 days. But, the amount of work that they needed to accomplish in building the strength of the hive-before the Fall set in? The odds were against them for survival. The next best thing to make up for my lost time was to buy a nucleus hive or a "Nuc". Beekeepers create Nucs by using an existing Queen and her workers and sell them as a package. They are sold with 3 to 5 frames of their mini hive which consist of an equally balanced proportion of honey, pollen and capped brood (cells containing eggs and emerging workers) and the promise of a successful hive. These honey bees already function as a family; committed to their Queen and her brood. So, transplanting them from their small Nuc box, to a larger hive, only adds to their expansion and production.

As the bumpy roads bordered by Dairy farms and rolling acres of corn traversed to smooth pavement greeted by small vacation towns on channeled waterways, the entire drive home from The Farm was consumed with my thoughts. Is it too late to get in on buying a Nuc? ...Most of these are pre-ordered months ago. Maybe I could email around?...I had maybe three connections at the most, to guide me. As I pulled into our driveway, and placed the truck into park, I felt no impulsion to move from the leather driver's seat; I was glued by a mixture of concentration and anxiety. I ended my thoughts with, "You need to get on this now" and promptly jumped out of the truck and headed into the house, leaving my Beek equipment settled in the back.
honey bees
Two days later, I found myself pulling out of my driveway at 7:00 AM, with sleepy kids in tow, and a full cup of to-go coffee, on an hour and a half journey to the Kettle Moraine area of Wisconsin to pick up my Nuc. Once I had the Nuc safely nestled in a plastic bin the back of the truck, I programmed the navigation on my smart phone to take me directly to The Farm. I had a time crunch to deal with, but the Beekeeper gave me plenty of advice to act on, and I wasn't going to let an ounce of it slip away to time. The transfer from Nuc to hive went smoothly, as I carefully placed frames thickly laden with Italian honey bees into their new home. Lucky for me, I had easily found the Queen on the brood frame, as she was busily tending to her business. On the outside frames of the hive, the original stranded bees had surprised me with their lackluster movement; meandering around in circles as if they were hopelessly melancholy without a Queen. Upon learning of my situation, the Wisconsin Beek was concerned about the stragglers, and he advised me before to just merge the two hives immediately. 


As a precaution for a few days, I stapled insect screening to the front entrance of the hive, with a small access opening large enough for workers, but not the Queen. I studied my work, and concluded that this was IT for the year. If it works, it works. If not, well...if you fall off the horse, you always get back on...but never without a lesson learned.

Cheers!

Wednesday, June 5, 2013

No Bees? (The Plot Thickens by Rejection)

So, I have been dumped...rejected...by my honey bees. After 8 full days after setting up shop in The Farm hive, my bees have flown. And let me tell you how it went down:

I set up my little house of honey facing South by South East on the edge of our Black Walnut grove overlooking our Alfalfa hay fields. The babbling of the creek that crosses our property was just a straight shot and in line with the honey bees range; it was a perfect spot. The weather had unseasonably changed to cooler temps hovering around 60 degrees, and it seemed to rain almost every day. But, I managed to get my package of Italian bees in their hive without a hitch during a break in the weather...and was pretty confident with my first time out. I fed the little babies, and tucked them in their darkness; leaving them to work on freeing their Queen from her cage and building honeycomb.

photo credit: Dadant & Sons Inc.
More cooler dips in temperature with rainy days, left me worrying about the bees. But, I knew that it would take about 4 days for the bees to release the Queen from her 3 cell cage (including eliminating the dead attendant bees trapped with her) so, I waited, not wanting to disturb their process. Finally, it was time to go in for an inspection...

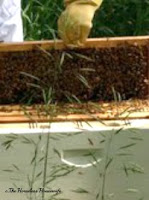
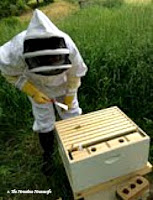
Upon pulling up to The Farm, we saw that the first cutting of hay was down and raked...awesome. Cutting hay, like installing bees, is completely dependent on dry weather. Walking the path through the Walnuts, I noticed that some wild black raspberries sprung up along the old wire cow fence...awesome. The birds must have helped with that last year, and those berries will add to my jam supply. Then with my smoker in one hand, and my hive tool in another, I approached my hive and saw: zero activity at the door. Not good. Holding my breath, I removed the outer cover, a few bees were hanging out on the inner cover, so I removed that one carefully. Then just between the two frames, where the Queen cage hung, there was a cluster of bees. A few other bees were walking around on the outside frames, but the majority of the hive was gone. Raising the Queen cage out from between the frames that it had been resting on; bees clung to it like a lifeline..the Queen's scent was all over it. I half expected to find a dead Queen inside but, it was completely the opposite. The Queen had indeed been released, and the entire cage was scrubbed clean by the nurse bees. On the two frames that bordered the Queen cage was fully drawn out clean honeycomb. Puzzled, I searched for a Queen, but knew the outcome already. Feeling sorry for the bees left behind, I topped off the feeder with sugar water, and closed up the hive.

beekeeper

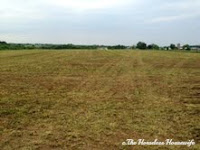
Looking out towards the mowed path of hay, that started to crossed out 20 feet in front of me, I wondered if the machinery was the reason. Or, the new "smell" of the hive, or even the call of the wild from the 'back forty' trees in conservatory? I was keenly aware that I was overdressed, and unzipped my veil, when my mind kicked into action: 'What to do now?'

mowed hay field

Monday, May 20, 2013

Farm Chit Chat Blog Giveaway!

The Horseless Housewife is now apart of a great farm, gardening and homesteading blog called Farm Chit Chat! Stop by for some coffee and cake, but stay for the wisdom and Blog giveaway! Enter here

Cheers!


Tuesday, May 14, 2013

No bees?

So...I was hoping that I would be able to show you my fun and exciting undertaking with starting my first hive on The Farm...this week. Unfortunately, I received an urgent phone call and email from my package supplier, that the bees won't be ready to ship until the 22nd of this month. The explanation?-the rainy weather. The excessive wet weather had caused the bees to be underdeveloped, and therefore not ready to start a new hive. A very late start for a great honey crop, but I can be hopeful, right?

Cheers!

Saturday, May 11, 2013

Barn and Property Fire Prevention: Fire Breaks

Photo credit: The Daily Herald
My heart always sinks when I hear word of a barn fire; especially so if I know if it's a boarding barn full of horses. Whether it's reported as breaking news, or by word of mouth, the panic and devastation associated with the fire always extends beyond the actual incident. Although most barn owners, either backyard or big facilities, have precautions in place to prevent fires inside the barn, what happens if the fire comes to you?


Having a barn (and your own residence and property) that is surrounded by pasture or woods, is in need of a fire break. A fire break is defined as a large road-like clearing of vegetation that stops or slows a fire from proceeding past it by eliminating it's fuel. Granted, a large roaring fire combined with a windy day may be able to "jump" the break, the clearing of the vegetation for the road itself, allows the firefighters and equipment the access they would need to control the flames.

So, where do you start? Begin at the building itself, and clear away any dried leaves/debris from your roof and gutters. If there is any unwanted vegetation growing along side the building itself, clear that away also. Remove old pallets, wood piles, tires or other combustible material that is likely to be discarded behind an out building or barn. If needed, eliminate any fuel for a grass fire by mowing tall grass, and trimming away dead branches in landscaping.

Photo credit: unknown (AUS)
When it comes to creating a fire break, a minimum of a 20 foot gap is recommended by most fire services. If you have naturally occurring creeks, streams or ravines close to your barn or property, you are one step ahead of a grass or forest fire. Extending the fire break on either side of the banks by clearing any vegetation, small trees or bushes. Otherwise, closely mow your fire break around your barn and property with a tractor mower or brush hog; bare ground is the desired result. If you have large trees, trimming up the lower branches also reduces ground fires from climbing the trees.

Fire Flapper
If you would like to go one step forward, purchasing some specialized equipment for grass fires may be well worth the investment one day. I would recommend a few fire flappers (click here). These heavy, rubber "mud flaps on sticks" were standard equipment in Police cars back in the day. I can personally tell you these are the best tool in a pinch when smothering grass fires; just don't use them while wearing polyester uniform
pants!

Lastly, when all your hard work is done, don't forget to call your local fire service and request an inspection. Not only will they give you some suggestions on places you may have overlooked, but you will be making them aware of your easy to access (and protect) property.

Cheers!

Sunday, May 5, 2013

Mother's Helper Tip: Puzzles

When your children have various puzzle versions of Disney Princess, Dora, Thomas the Tank Engine, etc. etc...it's definitely a chore when it comes to clean-up! Why not label or stamp the back of each whole puzzle's piece? It definitely becomes a time saver, and aids in clean-up participation! Cheers!

puzzle labels